Showing posts with label Punch Art. Show all posts

Wednesday, January 11, 2012

Angry Bird Tag...


I got this wonderful idea for an angry bird punch art from Michele and Teri. Please check out their blogs to see their creations. I tried my best to follow the instructions on Teri's blog, but had to make do with the punches I had. Either way, I think it still came out looking like an Angry Bird... lol!

Friday, January 6, 2012

My December CATS...


Here is the card & tag set that I made for my CATS partner Tia. The theme for this month was Christmas. So I dusted off some of my punches and worked on some old Christmas punch art to decorate my card & tag. I hope she liked it!

Wednesday, May 11, 2011

Sunflower Punch Art...


Here is a card that I created for my dear friend's dad. It's supposed to be a "masculine" card, but I know you're looking at the sunflowers and thinking that's not "masculine." LOL! I totally agree, but whenever I see sunflowers, it reminds me of my friend and her dad. So that's the reason for the sunflowers on his card.

As I was looking on Splitcoast, I came across a bunch of sunflower punch art that I thought would be perfect for my card. Click here to see the one I chose to CASE.

Thanks for stopping by! I hope you all enjoyed your Mother's Day celebrations!

Monday, May 2, 2011

Pizza Box...


Sorry about the late post. I was feeling under the weather yesterday and didn't get around to posting anything until now. I wanted to share with all of you another pizza box, but this time I decorated it using my Bird of Paradise punch art. The sentiment is from the Fifth Avenue stamp set. Wishing you all a great week!

Wednesday, April 27, 2011

Bird of Paradise Punch Art Instructions...


To make the Bird of Paradise punch art, all you will need is the Two-Step Bird punch. Punch 2 pieces of Pacific Point card stock as seen in the above picture.


Next, punch out 2 Pumpkin Pie and 1 Old Olive birds. Cut these pieces on the lines in the picture above. Sorry, the lines did not come out too good.


Here are the pieces that you will need to make one flower. I used the sponge dauber and various inks to shade the edges of each piece.

The following pictures will show you how to assemble the flower:


Trim the excess off from the lower edge of the flower.


Here is a picture of the finished product... a Bird of Paradise flower!

Tuesday, April 26, 2011

Plumeria Punch Art Instructions...


To make a Plumeria, first start off by using the 5-Petal Flower punch on a piece of Whisper White card stock to punch out a flower.


Next, round off each petal using the paper snips. Also cut slits toward the center (see the picture above).


This is what your flower should look like when you are done snipping & trimming the petals.


Use the sponge dauber dipped in Summer Sun ink and dab the center of the flower. Curl each petal using the side of a pencil. There you have it... a beautiful plumeria!

Monday, April 11, 2011

Orchid Punch Art...


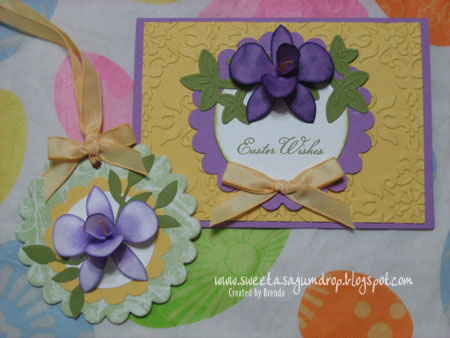
I think this will be the last of my "new" flower creations... at least for now. I created this Orchid, and the rest of those tropical flower punch art, with the inspiration of my Grandparents. My Grandpa passed away over 14 years ago and for those of you who have been following my blog for a while know that my Grandma passed away less then a year ago. They were both great to have around and I learned so much from them while growing up. They were truly the best and I miss them a lot! Creating all these flower punch art lately has brought back fond memories of them! You see, they used to have a yard filled with beautiful flowers which they would take to the graveyard every Friday (rain or shine). They grew Heliconias, Birds of Paradise, Torch Gingers, but especially Orchids. They had a whole hot house filled with these beautiful Orchids. So every time I see these flowers I always think of them. Sorry to get off track, but I just wanted to share the little story as to why I've been creating these flowers. Okay, back to the Orchids... to create this flower, I used the Fancy Flower punch. I trimmed down 3 out of the 5 petals to give it the Orchid shape. For the center, I punched out another flower and used only 1 petal. I stuck a little strip of yellow cs in the center and rolled/glued it. I then poked a whole in the center and stuck it through (gluing the end tip to the back of the flower). The larger petal in the center is just folded at the end and glued down. I hope to one day make a tutorial for these flowers, but with life being so hectic lately, I'm not sure if I'll have the chance anytime soon. Hopefully I'll get around to it. Thanks again for stopping by. I hope that you have been inspired to give these a try too!

Friday, April 8, 2011

Another Bird of Paradise...


I created another Bird of Paradise punch art and decorated a little panel to slip into this waterglobe. I don't remember exactly where I got this waterglobe, but I'm thinking maybe from Ben Franklin or even Wal-Mart. I've had it for a while and only now, decided to use it... lol! Thanks for all the "sweet" comments that you've been leaving me. It brings a smile to my face to know that you appreciate my work. Have a great weekend!

Wednesday, April 6, 2011

Bird of Paradise Punch Art...


So sorry, but this will be a quick post.

I created this card for a dear friend of mine and I'm hoping that she likes flowers too... lol! Some of you might have already saw my original post of tropical flower punch art which included a Bird of Paradise. If not, you can go back a few postings to find out how this flower was created using the Bird punch. Thanks for stopping by! Hope you're enjoying your week!

Monday, April 4, 2011

Graduation in April?


No, no it's not graduation time... yet! I just wanted to get a head start on some cards so that I'm not stressing come graduation season. Here is a card that I decorated with some Plumeria punch art that I created. I used the 5-petal flower punch and rounded off each petal using my paper snips. I also cut the slits between the petals further toward the center. Then I dabbed the center of each flower with some Daffodil Delight ink using the sponge dauber. The final touch to making them look like Plumerias was curling each petal with a pencil. That's it! Hope you'll start creating some of your own!

Friday, April 1, 2011

Heliconia Punch Art...


Yesterday was a free day for me so I decided to tackle more of my punch art sketches. I decorated these two cards with some Heliconias that I created using the Bird punch again. All I did was trim down the birds body for the lower part of the flower. The birds wings were used for the top portion. This was fun to make because Heliconias come in a variety of colors... just try and google it. These were two of my favorites. Check back with me next week as I will have more punch art flowers to share with you. Yes, I have to say that I definitely had a productive day of crafting. Have a safe, but relaxing weekend!

Wednesday, March 30, 2011

Tropical Punch Art...


It's been a while since I first thought about creating some tropical flowers with my punch art, but needless to say, I never bought the bird punch until now. So now that I finally own the Bird punch, I could create these flowers! This is actually supposed to be a flower arrangement consisting of a Bird of Paradise and a couple of Torch Gingers. I sure hope that's what they look like! To create the Bird of Paradise, I used the Bird punch. I trimmed down some of the pieces to get them to look the way that I wanted it to. To create the Torch Ginger, I used the 5-Petal Flower punch and the Boho Blossom punch. The bowl that is holding these flowers was created with the wide oval punch. Hope you enjoy my creation! Thanks for stopping by!

Thursday, March 3, 2011

Happy Girl's Day...


Here are the treats that I made for my girls' teachers. They are filled with individually wrapped mochi. To make these boxes, I used the Box #2 die. I added a half piece of the Clear Circle die to the top and trimmed off the excess. The stamp set I used is Kimono Kids. For the lantern punch art, I used the 1-3/8" circle punch, stamped some cherry blossoms on top, and then crimped it. I also added a piece of 3/4" black circle to the top and bottom along with some cord on top. I hope these treats put a smile on their faces! Happy Girl's Day everyone!

Friday, February 11, 2011

Build-A-Bear is Back...


I dusted off my build-a-bear die and decided to create these cuties... BAB meets punch art! LOL! After putting these bears together, I added them to some notepads that I had covered previously. Wishing you all a fabulous weekend! Take care and be safe!

Monday, February 7, 2011

"Swing" Gift Card Holder...


My hubby came home one day of a sample of a "swing" card (I think that's what you call it). I decided that I wanted to give it a try, but also include a pocket in the back to hold a gift card. This is what I came up with. I used one of my new SAB stamp sets to decorate the card and added a punch art monkey to the front. Hope you all enjoyed your weekend! The days went by too quickly... it doesn't seem like we just had a weekend... lol!

Friday, February 4, 2011

The Peacock is Back!


I created this cocoa box for our upcoming Stamp Camp this month. It is going to be up for grabs at our Silent Auction table. The peacock was created using the scallop circle dies, owl punch, itty bitty punches, & the 3/4" circle punch. I shaded the edges of the peacock's feathers using the sponge dauber and of course added lots of rhinestones! The dimensions for the cocoa box can be found here. Hope you all have a great weekend!

Monday, January 24, 2011

Cupcakes Anyone?


A friend asked me to help her design invites for a shower she is planning. The theme is cupcakes and the color combo she wanted was pink/brown. This is what I came up with. The little cupcake was created using the scallop circle punch and a square piece of cs that was crimped. The big cupcake was actually made by using a stamp and cutting it up to create a pattern. I then used the pattern to trace and cut out on the cs. I ran the bottom of the cupcake through the crimper and the top of the cupcake was run through the big shot using my texture folders. Thanks for stopping by! Have a great week!

Wednesday, December 22, 2010

Reindeer Punch Art Ornament...


Somehow I managed to volunteer myself to do a craft project for DD2's class Christmas party last week! Here is a picture of the project that I had them make... a punch art reindeer ornament. I was inspired by a project that Teri had us make earlier this month at her Christmas gathering... thank you Teri! I did most of the prepping so that things would go smoothly... which it did with the help of DD2 as my assistant. The 2nd graders all enjoyed making these ornaments... both boys and girls! Some of them were even sweet enough to ask me if they could give their ornaments to their parents for Christmas... aw! All in all it was a fun, but very busy day for me as I also volunteered to help out with Santa's Store during DD3's class party that same day. No matter how exhausted I was, I am thankful for the memories that were created that day. They will last forever in my heart! Merry Christmas to all of you! Have a safe holiday season!

Monday, December 20, 2010

Gingerbread Bag...


I made a few of these bags for some "sweet" friends. I filled them with goodies that hopefully, the recipients will use. I can't believe that Christmas is almost here! Are you done with your shopping yet? Have a great week!

Friday, December 17, 2010

Coupon Book Holders...


While shopping last week, my Mom came across a great deal too good to pass up! Pizza Hut is selling coupon books for $5, but inside there are coupons for over $20 of free food like a personal pan pizza, breadsticks, etc. I decided to pick some up for some friends and these are the holders that I put them in. I decorated them with some of my Christmas punch art. I hope that they will put these coupon books to good use because I know I will. I picked up a few extra for my family to use too... hehehe! Have a great weekend!